Configuring Microsoft PowerApps to Change Skill Scores
This example shows you how you can use Microsoft PowerApps to sign in and out of Skill.
Prerequisites
- Make sure your Agents are already configured in the UCC A Unified Contact Center, or UCC, is a queue of interactions (voice, email, IM, etc.) that are handled by Agents. Each UCC has its own settings, IVR menus and Agents. Agents can belong to one or several UCCs and can have multiple skills (competencies). A UCC can be visualized as a contact center “micro service”. Customers can utilize one UCC (e.g. a global helpdesk), a few UCC’s (e.g. for each department or regional office) or hundreds of UCC’s (e.g. for each bed at a hospital). They are interconnected and can all be managed from one central location. with Skills.
Create PowerApp
-
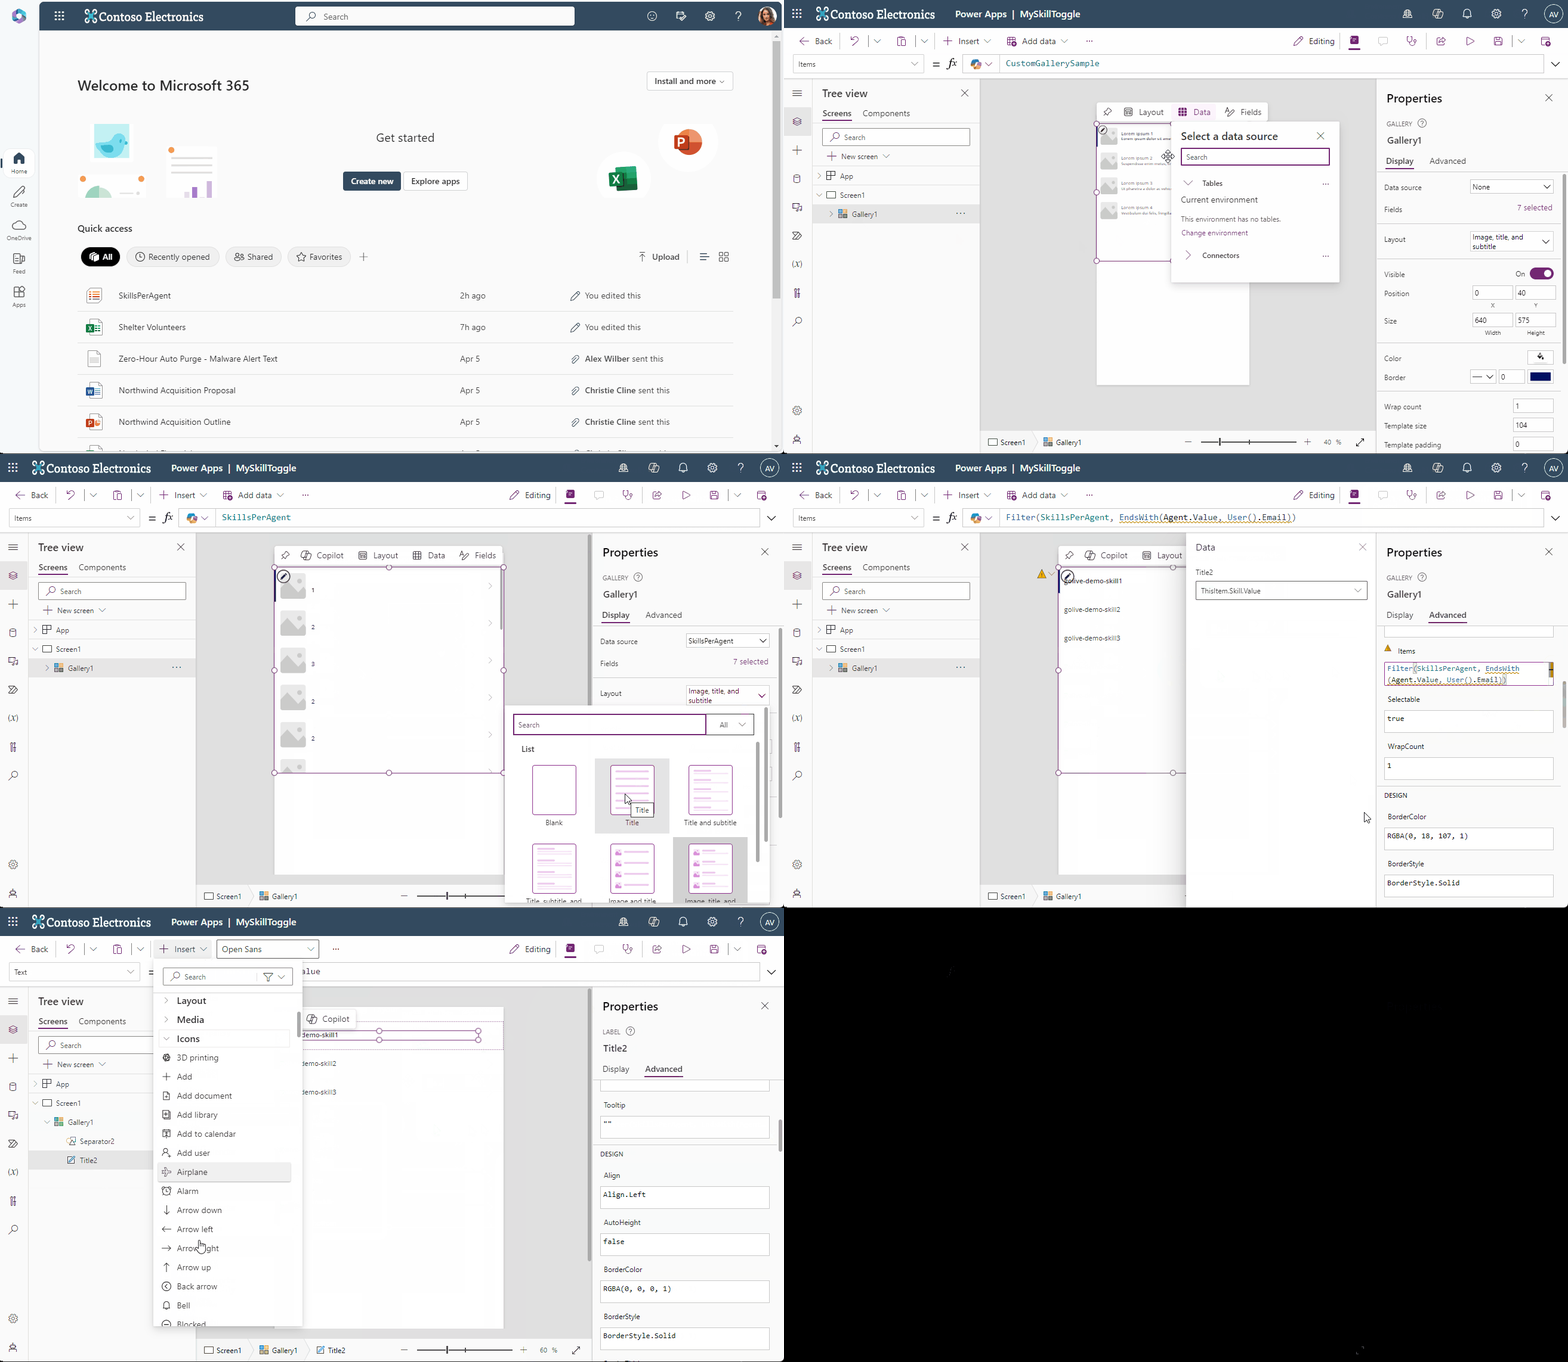
Navigate to https://make.powerapps.com
-
Select Create and Blank app
-
Select Blank canvas app and hit Create
-
Give the app a Name and select Phone layout and hit Create
-
Select Create a gallery
-
Select a data source (SharePoint)
-
Enter or select your UCC site url and Connect
-
Choose SkillsPerAgent and Connect
-
Change Layout to Title, Edit fields, Set Title to Skill, Set Display value to Value
-
If you want to filter the list to only show the logged in user, then you need to filter the data.
Go to Advanced, change the value of Items to:Note
On some clients the ',' (comma) needs to be ';' (semi-colon).
-
(Optional) Delete NextArrow
-
(Optional) Delete Rectangle
-
Select the Title item, insert two buttons and move them in position
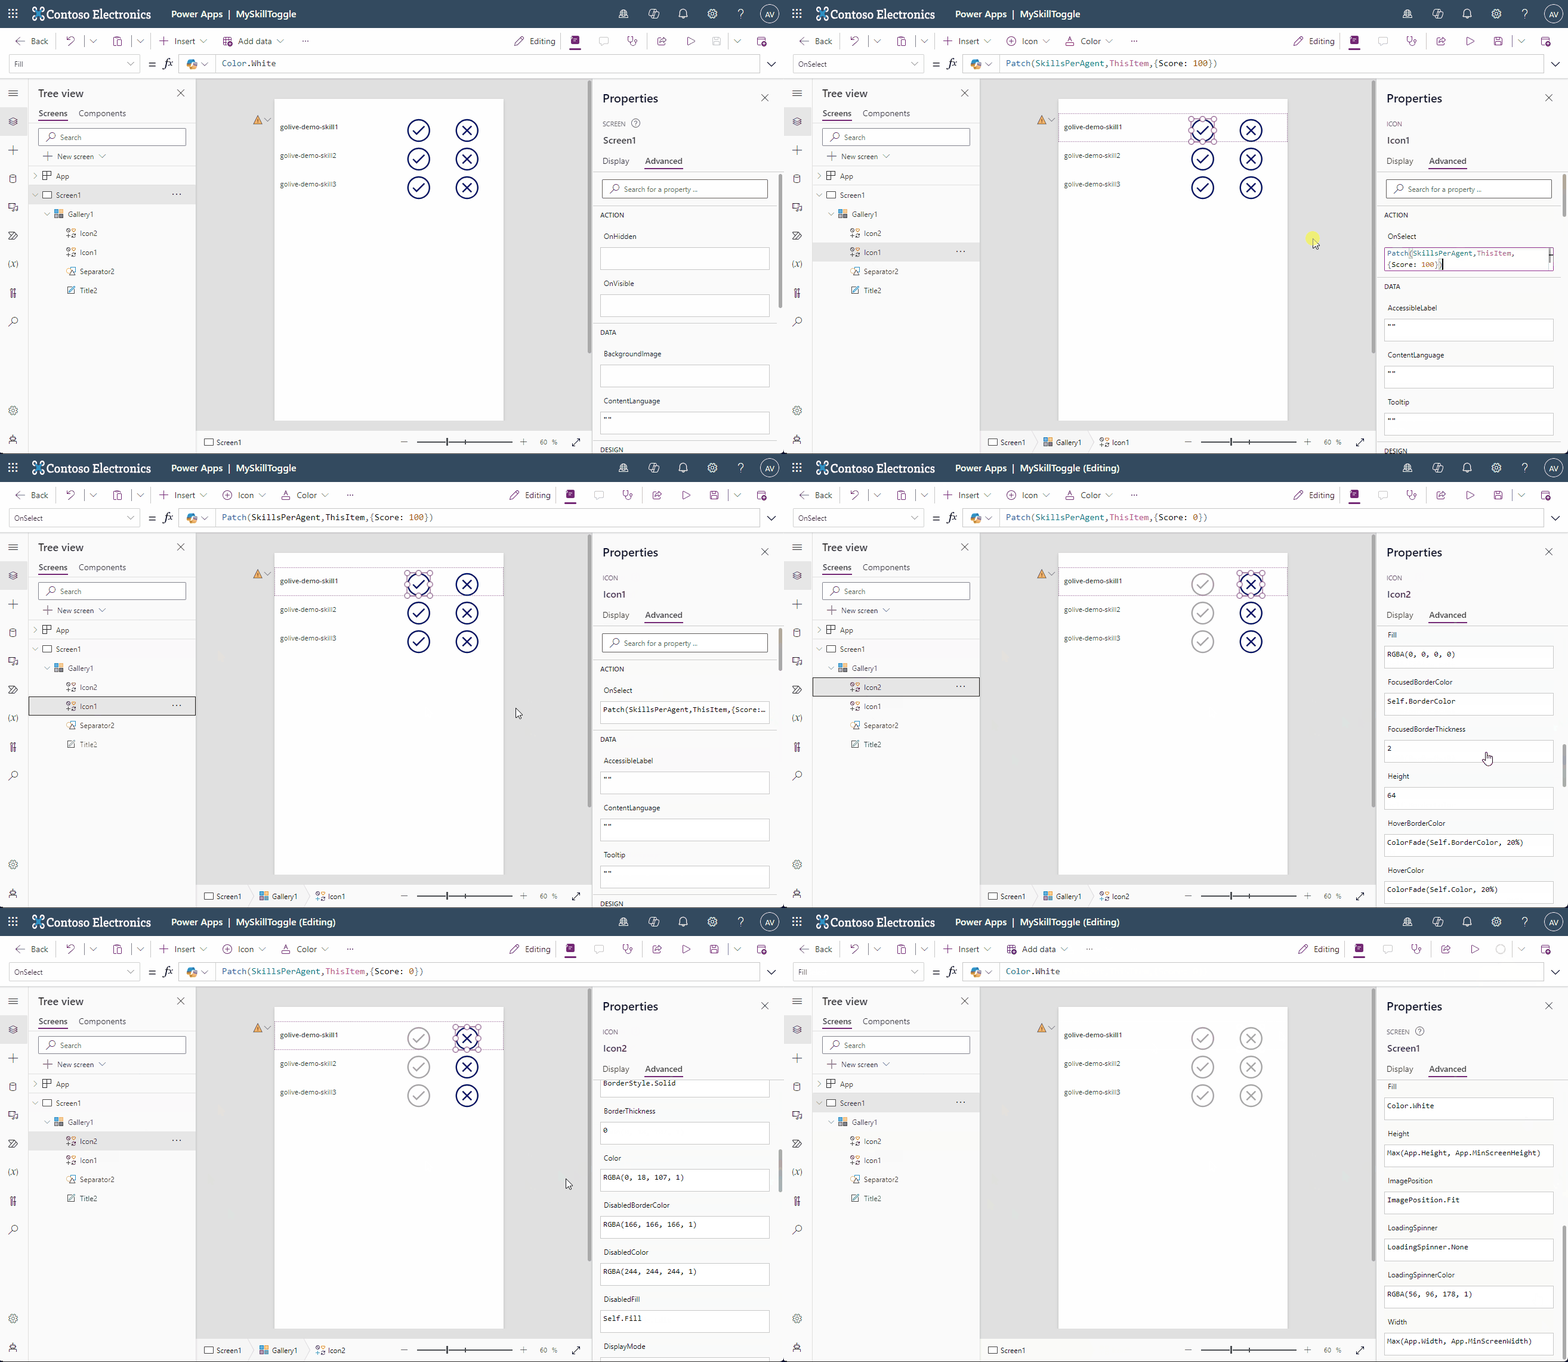
Proceed to Program the Icons
-
To program the behavior of the buttons Add the following code to the Sign in icon (OnSelect)
Note
On some clients the ',' (comma) needs to be ';' (semi-colon).
-
Add the following code to the Sign out icon (OnSelect)
Note
On some clients the ',' (comma) needs to be ';' (semi-colon).
-
(Optional) Add to following code to the Sign in icon (Color)
-
(Optional) Add to following code to the Sign out icon (Color)
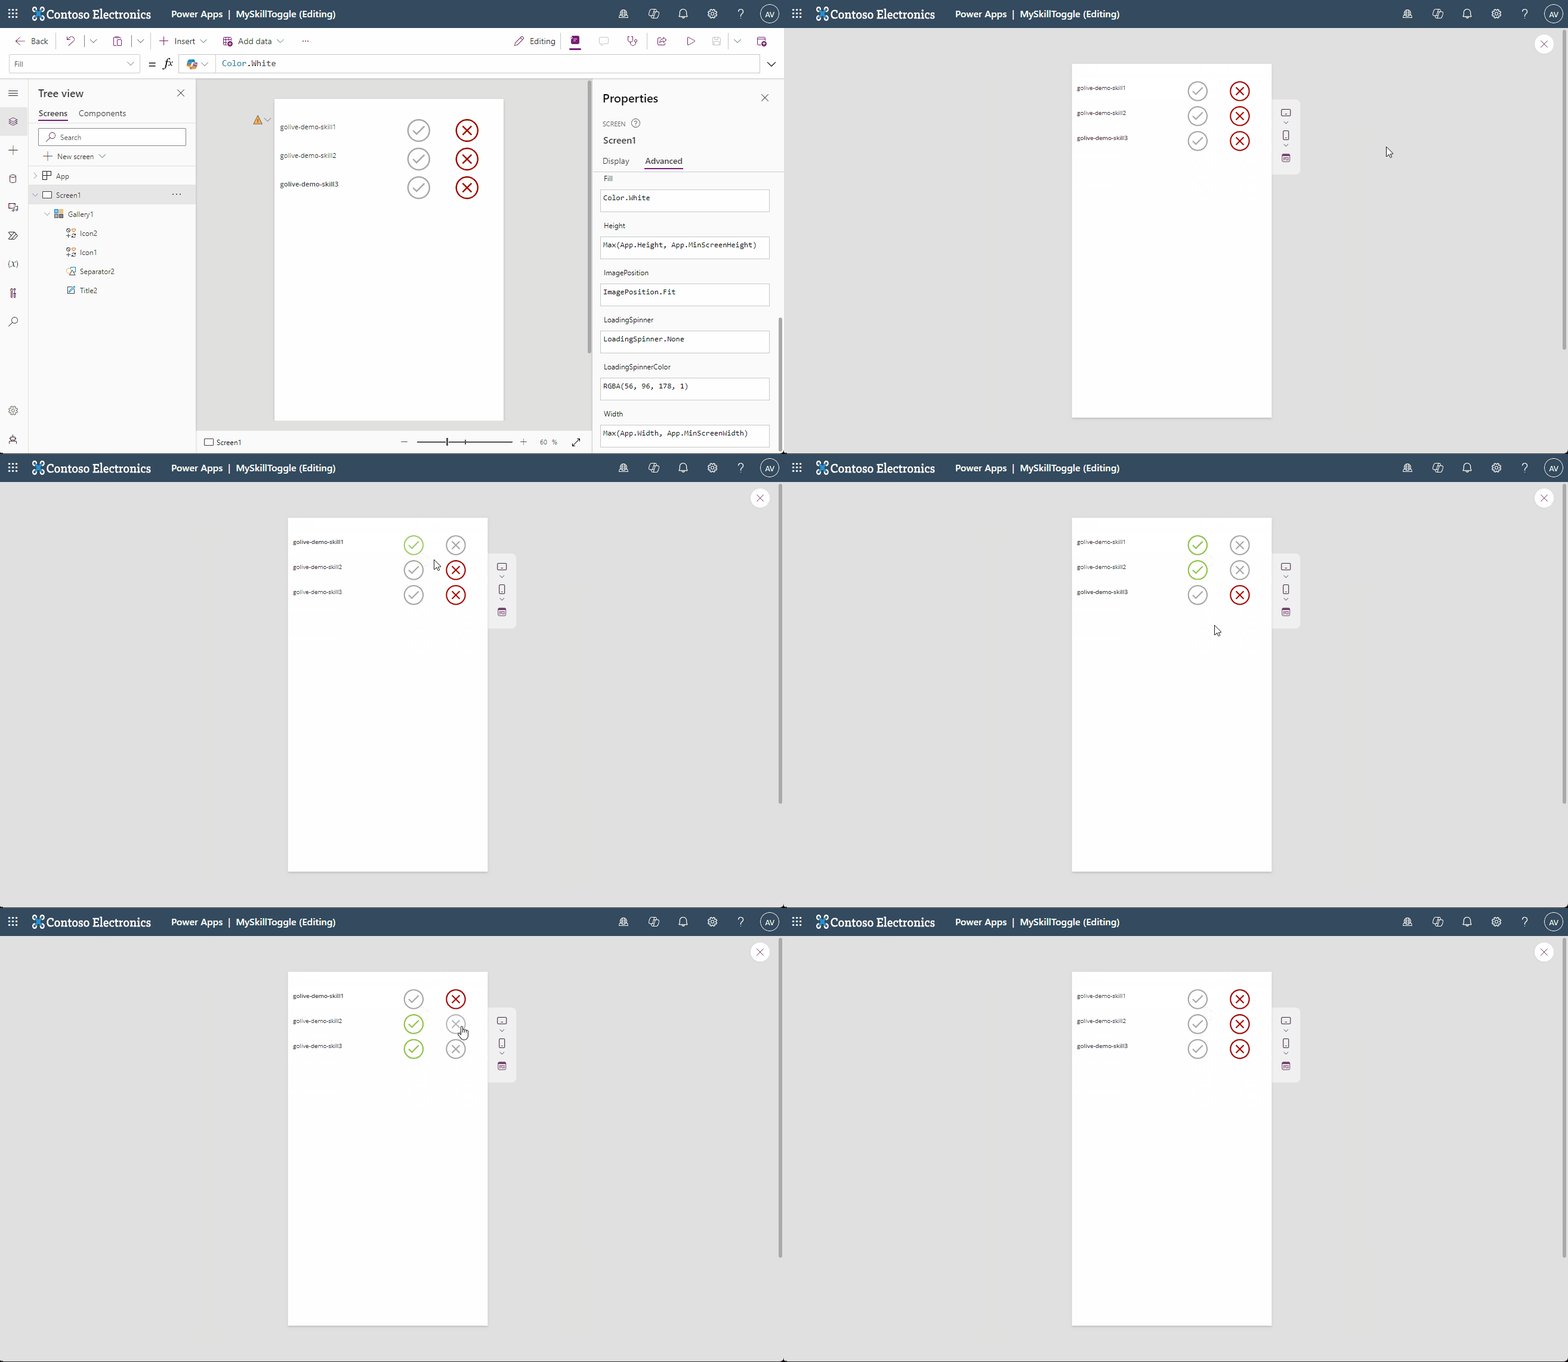
Result
When following the steps, you will have the following result:
Optional Items
Use multiple prio level buttons
Introduction
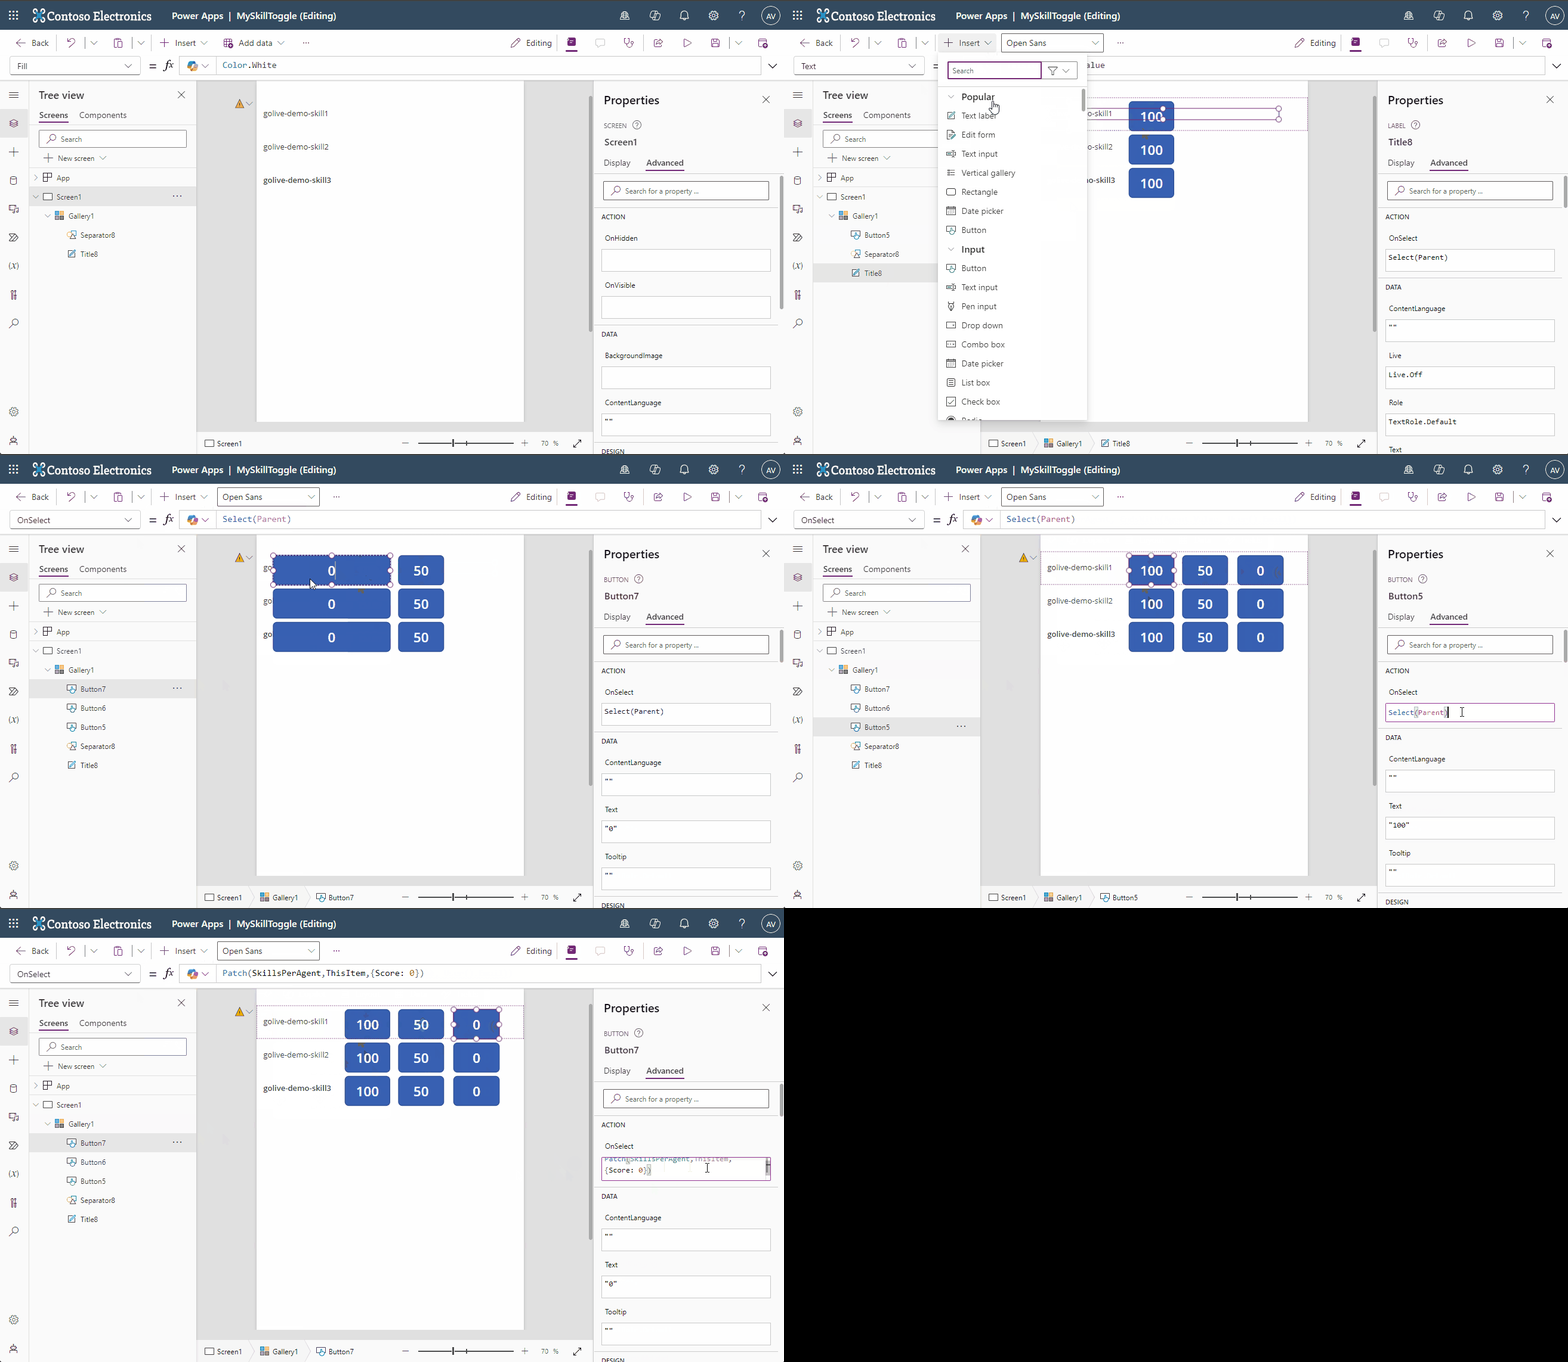
Beside sign in and sign out, you can also use multiple buttons to set prio levels.
Example
Configure
-
Add 3 buttons
-
Prio 1
-
Text = 100
-
OnSelect:
-
-
Prio 2
-
Text = 100
-
OnSelect:
-
-
Sign out
-
Text = Off
-
OnSelect:
-
-
Use prio sliders
Introduction
You can also use a slider to set prio.
Example
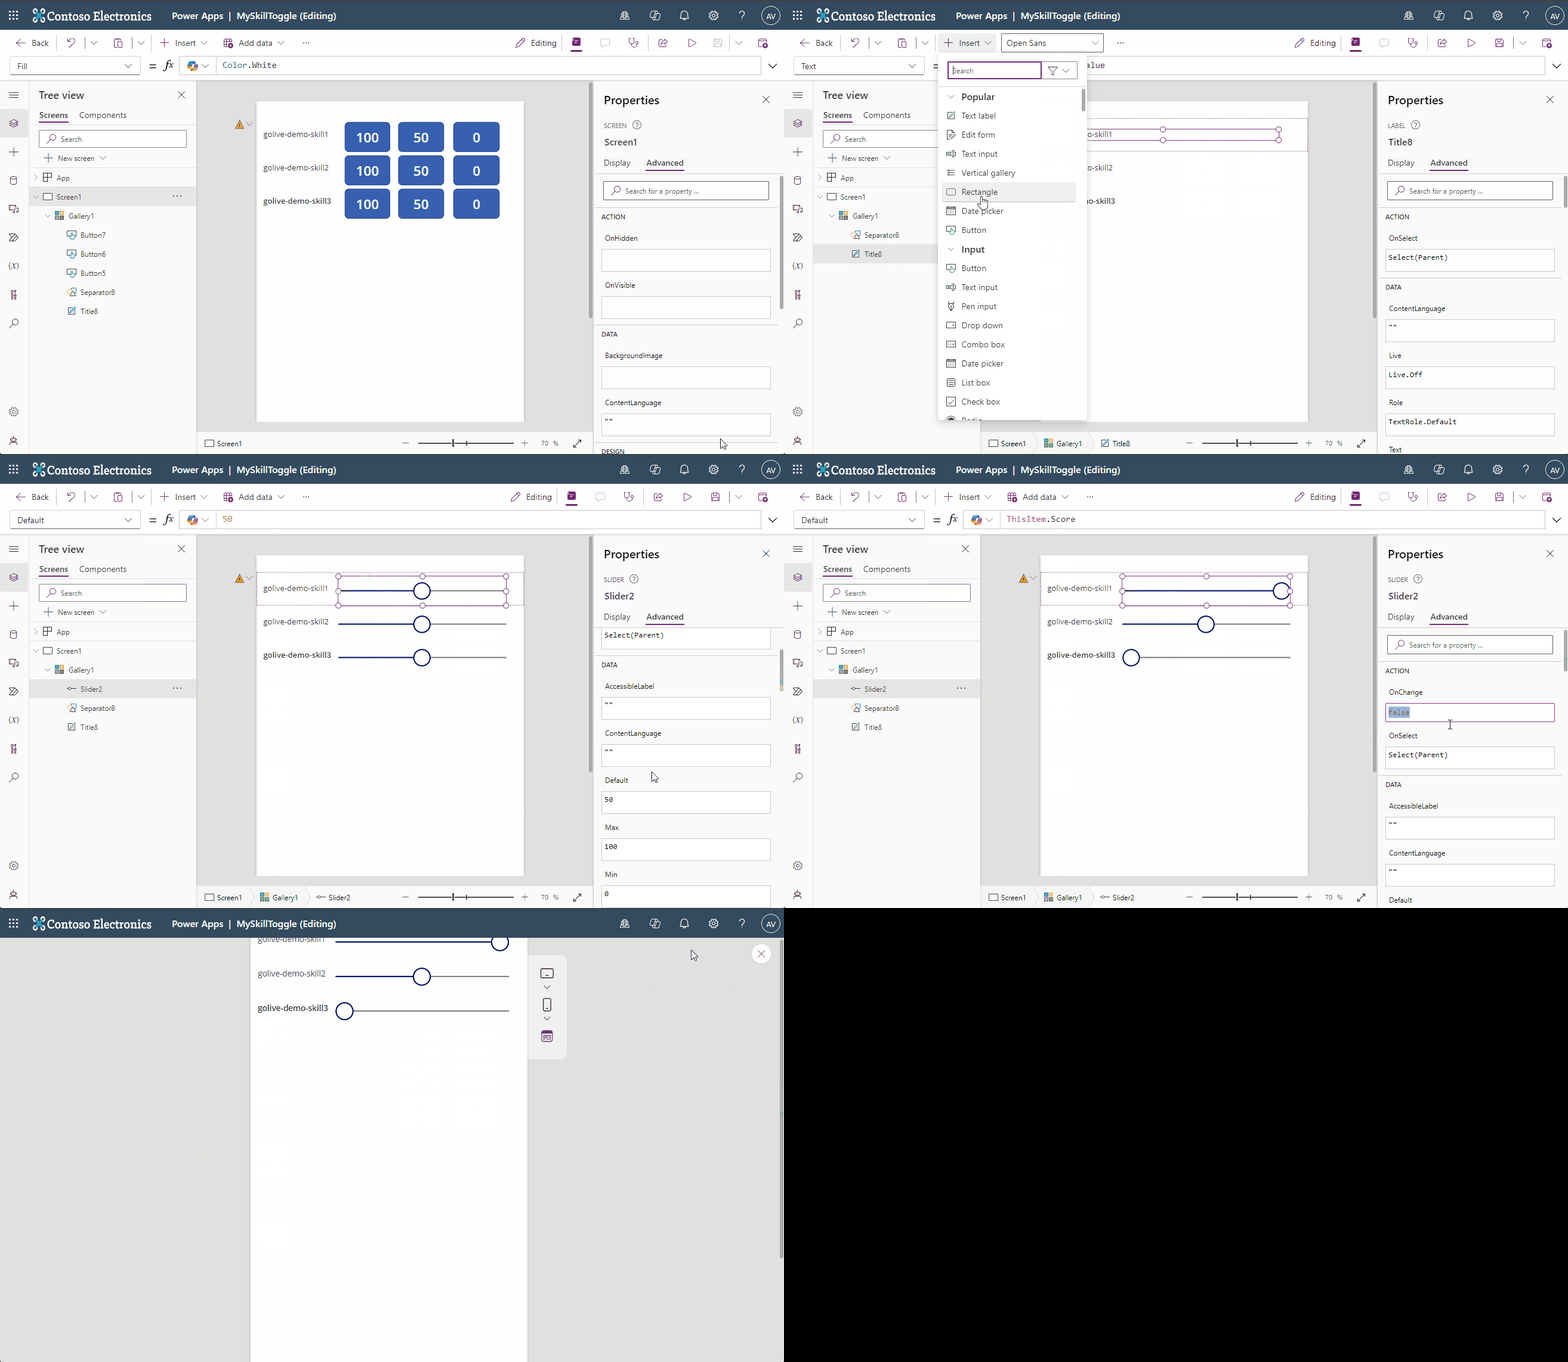
Configure
-
Add Slider to item
-
Add the following code to the Slider (Default)
-
Add the following code to the Slider (OnChange)