Prompt
Note
A Corporate license or higher is required.
Purpose
Prompts can be used to collect additional information about the caller and use that information for an action.
The Prompt function can give:
- Customers the possibility to enter a code within the IVR Interactive Voice Response, or IVR, is a telephone application to take orders via telephone keypad or voice through a computer. By choosing menu options the caller receives information, without the intervention of a human operator, or will be forwarded to the appropriate Agent. to be routed on.
- Route Customers based their information in a database.
- Give Customers information based on their information in a database.
Before a prompt can be added to the IVR, it needs to be created in the Prompt list on the server.
Note
This feature requires an additional prompt. Extra license may be required. Please contact your Sales Contact to verify.
Explanation per field
In order to manage Prompts, the following screen should be filled in:
| Item | Description |
|---|---|
| PromptId | The identifier of the prompt. This will be used when linking Prompts to IVR Questions. |
| Welcome | The message that is played when the prompt is chosen (text-to-speech). |
| Happy | If a correct code is entered, the prompt will forward the caller to this message.
Note The Happy item must refer to an IVR Question. |
| Sad | If an incorrect code is entered, the prompt will forward the caller to this message.
Note The Sad item need to refer to an IVR Question. |
| SuccesAction | The follow-up action if a correct code is entered. |
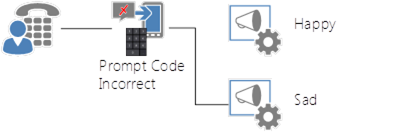
Prompt Scenario
If the caller enters the correct code, the prompt will forward the caller to the IVR Question “Happy”.
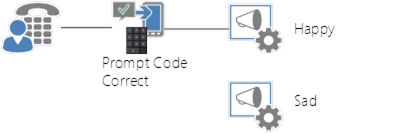
If the caller enters the incorrect code, the prompt will forward the caller to the IVR Question “Sad”.
Create/Edit/Remove item
Item can be created, edited or removed.
Warning
Updates to the system take place in real-time. Entering the incorrect information here may cause issues with your software. Proceed with caution.
- Open the list.
- Select the Add new item button.
- Enter the correct data in the window that appears.
- Select the Save button.
- Open the list.
- Tick the respective item.
- Select the “Edit Properties” button.
- Enter the correct data in the window that appears.
- Select the “Save” button.
- Open the list.
- Tick the respective item
- Select the “Delete Item” button.