Dialogue Manager Pre-queue stage connection with Dialogue Studio
Note
An Enterprise license or higher is required to access these features.
Introduction
The DialogueManager can communicate with Dialogue Studio to facilitate Pre-queue state communication with third party applications.
Prerequisites
-
Dialogue Studio enabled, see: Dialogue Studio Installation
Important Rules
All actions must be done in a single transaction
Because the Dialogue Manager uses stateless protocol in Dialogue Studio, all actions must be done in a single transaction. The flow always needs a starting point (incoming message) and an ending point (wait for message, enqueue, disconnect), in between you can perform your actions (say). So for example, when building a chat bot you need to make use of the "flowid" to continue your flow.
When will a text dialogue message enter Dialogue Studio
Assuming that the pre-queue stage has been configured (see: How to enable), the following logic applies for each channel.
-
Each first new email will enter Dialogue Studio.
Example: A customer sends an email inquiry for the first time. This email will enter Dialogue Studio for processing.
-
Reply emails when the text dialogue is still in the pre-queue stage. For example the pre-queue stage replies with an automatic answer (Say node) and finished with a Wait-for-Message node.
Example: A customer replies to an automatic response received from the pre-queue stage. This reply will enter Dialogue Studio.
-
All emails after the pre-queue stage (Enqueue node or Disconnect node) will not enter Dialogue Studio.
Example: After the initial email and reply have been processed and the conversation has moved past the pre-queue stage, any further emails will not enter Dialogue Studio.
-
All emails after a closed conversation will not enter Dialogue Studio.
Example: A customer wants to re-open a closed cased by the agent. This new email will not enter Dialogue Studio and the text dialogue will be directly queued for an available agent.
-
Each first message from a new phonenumber will enter Dialogue Studio.
Example: A customer sends an SMS for the first time from their phone number. This message will enter Dialogue Studio.
-
Reply message when the text dialogue is still in the pre-queue stage, will enter Dialogue Studio.
Example: A customer replies to an SMS received from the pre-queue stage. This reply will enter Dialogue Studio.
-
All messages after the pre-queue stage (Enqueue node or Disconnect node) will not enter Dialogue Studio.
Example: After the initial SMS and reply have been processed and the conversation has moved past the pre-queue stage, any further messages will not enter Dialogue Studio.
-
All new messages after a closed conversation will not enter Dialogue Studio. This is because SMS and WhatsApp are persistent dialogues and will be handled as a continuation of the previous dialogue.
Example: A customer sends a new SMS after the previous conversation has been closed. This new message will not enter Dialogue Studio as it is considered a continuation of the previous dialogue.
-
A webchat session initiates via a message will enter the pre-queue state.
Example: A customer initiates a webchat session via a message. This message will enter the pre-queue state.
-
A webchat session initiated via a Adaptive Card submit will not enter the pre-queue state.
Example: A customer initiates a webchat session via submiting an Adaptive Card. This submission will not enter the pre-queue state.
-
Reply message when the text dialogue is still in the pre-queue stage.
Example: A customer replies to a message received during the pre-queue stage of a webchat session. This reply will enter Dialogue Studio.
-
All messages after the pre-queue stage (Enqueue node or Disconnect node) will not enter Dialogue Studio.
Example: After the initial webchat message and reply have been processed and the conversation has moved past the pre-queue stage, any further messages will not enter Dialogue Studio.
-
All messages after a closed conversation will not enter Dialogue Studio.
Example: A customer wants to re-open a closed cased by the agent. This new message will not enter Dialogue Studio and the text dialogue will be directly queued for an available agent.
-
Each first message of a webchat session will enter the pre-queue state.
Example: A customer initiates a generic session for the first time. This message will enter the pre-queue state.
-
Reply message when the text dialogue is still in the pre-queue stage.
Example: A customer replies to a message received during the pre-queue stage of a generic session. This reply will enter Dialogue Studio.
-
All messages after the pre-queue stage (Enqueue node or Disconnect node) will not enter Dialogue Studio.
Example: After the initial generic message and reply have been processed and the conversation has moved past the pre-queue stage, any further messages will not enter Dialogue Studio.
How to enable
The feature makes use of new Plugin Settings. These settings are necessary to communicate with Dialogue Studio.
In the Plugin Settings in SharePoint enter the following settings:
Plugin Settings
| Name | Scope | Value | Description |
|---|---|---|---|
| Uri | DialogueStudio |
Uri to DialogueStudio |
Uri to DialogueStudio |
| Enabled | DialogueStudio |
TRUE |
Indicate if DialogueStudio should be used or not |
| ApiKey | DialogueStudio |
[ApiKey] |
Used for authentication to Dialogue Studio. You can use any string you want, for example: https://randomkeygen.com/ |
How to use
After configuring the Plugin Settings, you can get started in Dialogue Studio. For an overview of the available nodes, see: Dialogue Manager Nodes for Dialogue Studio
Initiate a flow
The first node you will need it the incoming message node. In this node you need to copy the same key as the ApiKey in the Plugin Settings .
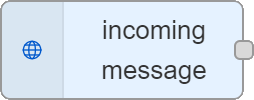
From here you can build your flow.
Important
Regardless of the number of UCC A Unified Contact Center, or UCC, is a queue of interactions (voice, email, IM, etc.) that are handled by Agents. Each UCC has its own settings, IVR menus and Agents. Agents can belong to one or several UCCs and can have multiple skills (competencies). A UCC can be visualized as a contact center “micro service”. Customers can utilize one UCC (e.g. a global helpdesk), a few UCC’s (e.g. for each department or regional office) or hundreds of UCC’s (e.g. for each bed at a hospital). They are interconnected and can all be managed from one central location. or UCC Services you use, you can only utilize one “incoming message” node per Dialogue Studio instance. Ensure that all UCCs share the same “ApiKey”.
Unique flow per Channel
If you are using multiple channels, you might want to configure a unique flow per channel. This can be done by using a "switch" node:

The payload.channelId contains the id of the channel, below the translation to channel name:
| Id | Name |
|---|---|
|
0 |
|
|
1 |
Sms |
|
3 |
|
|
4 |
WebChat |
|
5 |
Generic |
Post one or more messages to the customer
You can post one or more message to the customer by adding a "say" node. In here you can type the message or have it generated based on an expression. For example by retrieving additional information from a 3rd party integration.

Wait on a message and continuing the flow
In some flows you might be need additional customer input to continue the conversation. This can be done by using the "Wait for message" node:
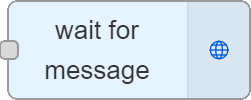
In here you can configure a "flowId", this "flowId" will be added to the payload in the "incoming message" node after the customer has replied.
If you want to continue the flow, this can be done by using a "switch" node:
The "payload.flowId" can be used to continue the flow at a specific place in the flow.